
› › Pick List – Frequently asked questions › How do I use the Pick List app
- This topic has 0 replies, 1 voice, and was last updated 4 years, 3 months ago by admin.
-
AuthorPosts
-
27 December 2021 at 6:16 pm #617
You can also watch our video tutorial on YouTube for a walkthrough of the app.
1. Viewing and selecting orders
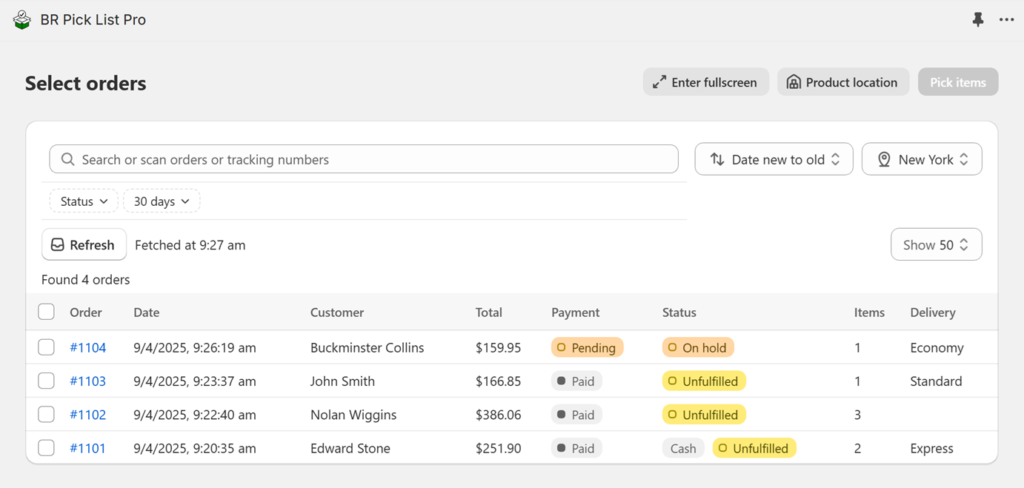
By default, the app displays only unfulfilled or partially fulfilled orders for the past 30 days on the “Select orders” page. You can also display fulfilled or archived orders using the Status menu. If your store has multiple Shopify locations, you can filter orders by inventory location from the drop‑down list. You can sort orders by date and filter them by payment status. The search box allows you to search by customer name, order tags, payment type, order status, and delivery type. To exclude keywords from your search, add a minus sign before the term. Example: To list all orders that are not Express delivery, search for -express.
2. Creating a picklist
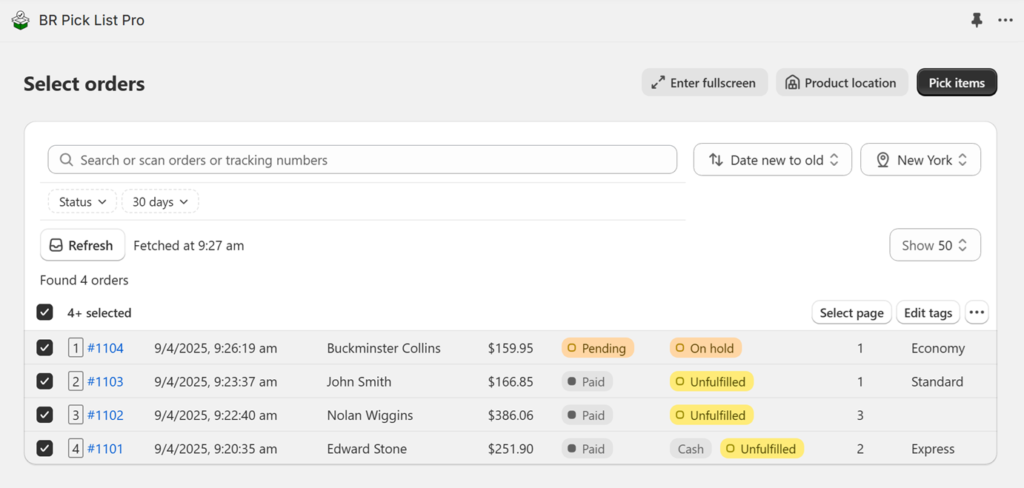
Select one or more orders and click the “Pick items” button on the top right to create a picklist. Each selected order is assigned a serial number inside a square box. This serial number appears in your picklist and is useful when using pick bins. The order in which you select orders is preserved: the first order selected becomes serial number 1, the second becomes serial number 2, and so on.
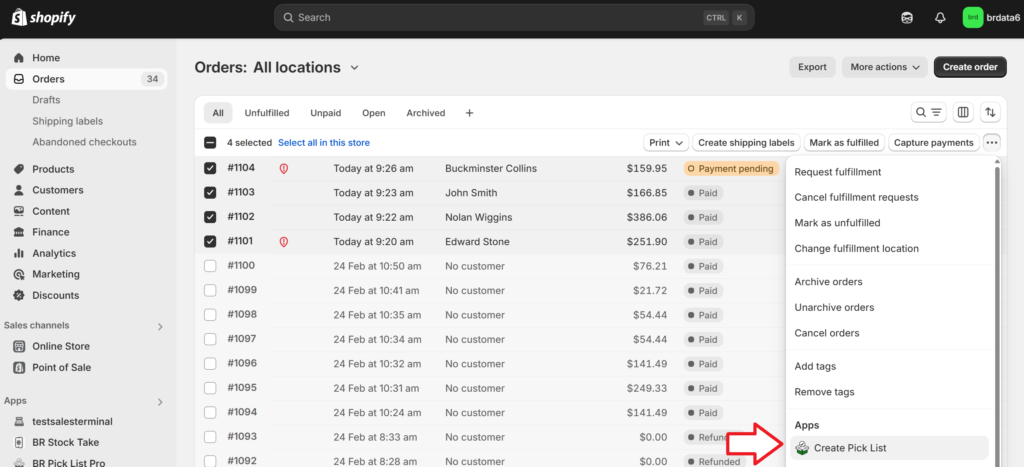
You can also select orders by scanning order numbers or courier tracking barcodes. Alternatively, you can select orders from the Shopify Orders page and click “Create Pick List” from the More actions menu.
3. Picking items
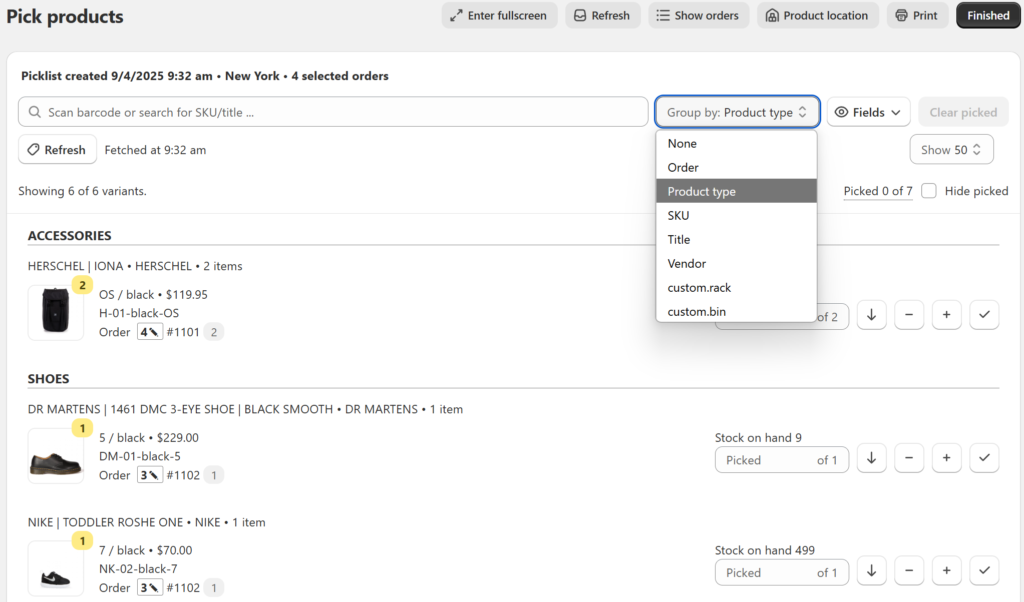
You can sort and group the picklist by: Product type (default), Order, SKU, Title, Vendor, Any product/variant metafield (if present).
To pick you can:
- Use the on-screen buttons (click the ✓ check mark to mark a product or variant as picked)
- Use a barcode scanner
- Use your device camera (Shopify Mobile or POS)
- Print the picklist (More actions → Print)
If a product has multiple variants, they appear below the product title. Example: BD Tunic Variants: L / Gold Stamp and M / Gold Stamp
For each product/variant, the app displays a list of orders requiring the item with the serial/bin number (inside a square box), the #Shopify order number, followed by the required quantity (inside a grey circle).
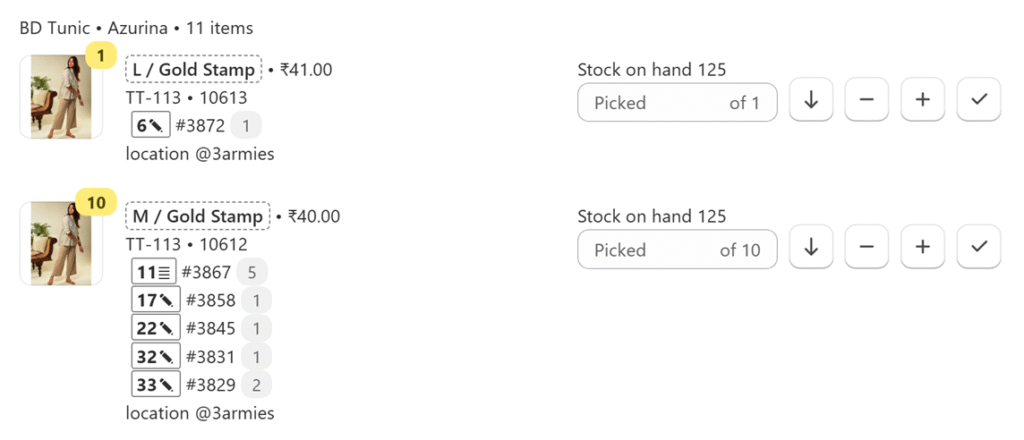
Click the Pencil icon next to the bin number to type or scan a Picking note into the order attribute field.
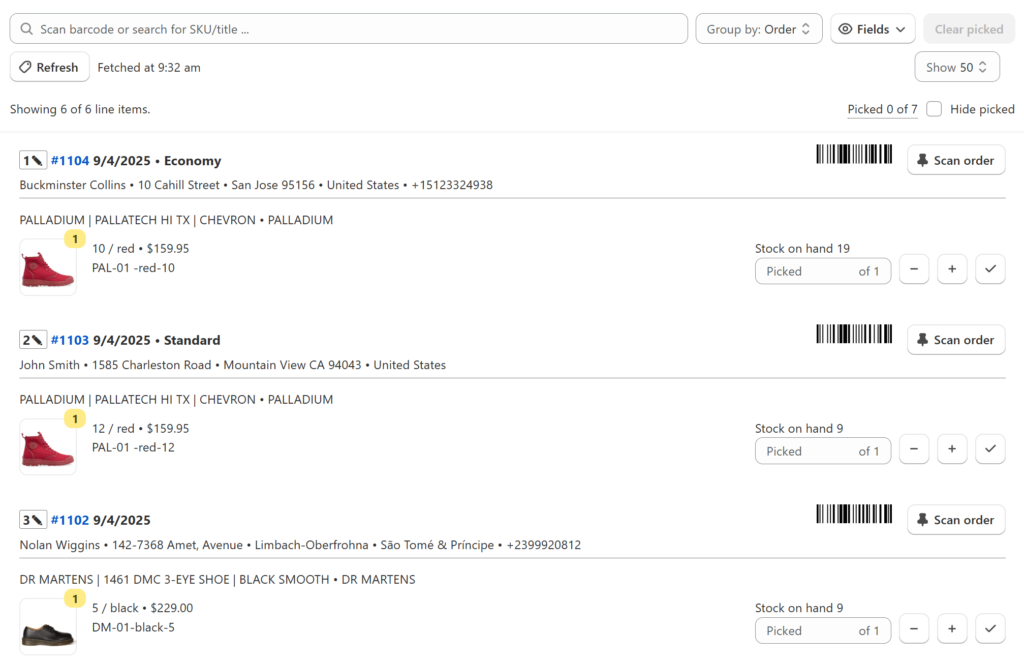
4. Picking by order (Group by: Order)
If you group by Order, you can pick individual orders using barcodes.
You can:
- Click the “Scan order” button to restrict the picklist to that order
- Type the order number and press Enter
- Scan the order barcode (from the screen or a printed slip)
Beep indicators:
- Short high‑pitched beep → Correct product scanned
- Two low‑pitched beeps → Wrong product scanned
- Long high‑pitched beep → Order fully picked
5. Finishing the picklist
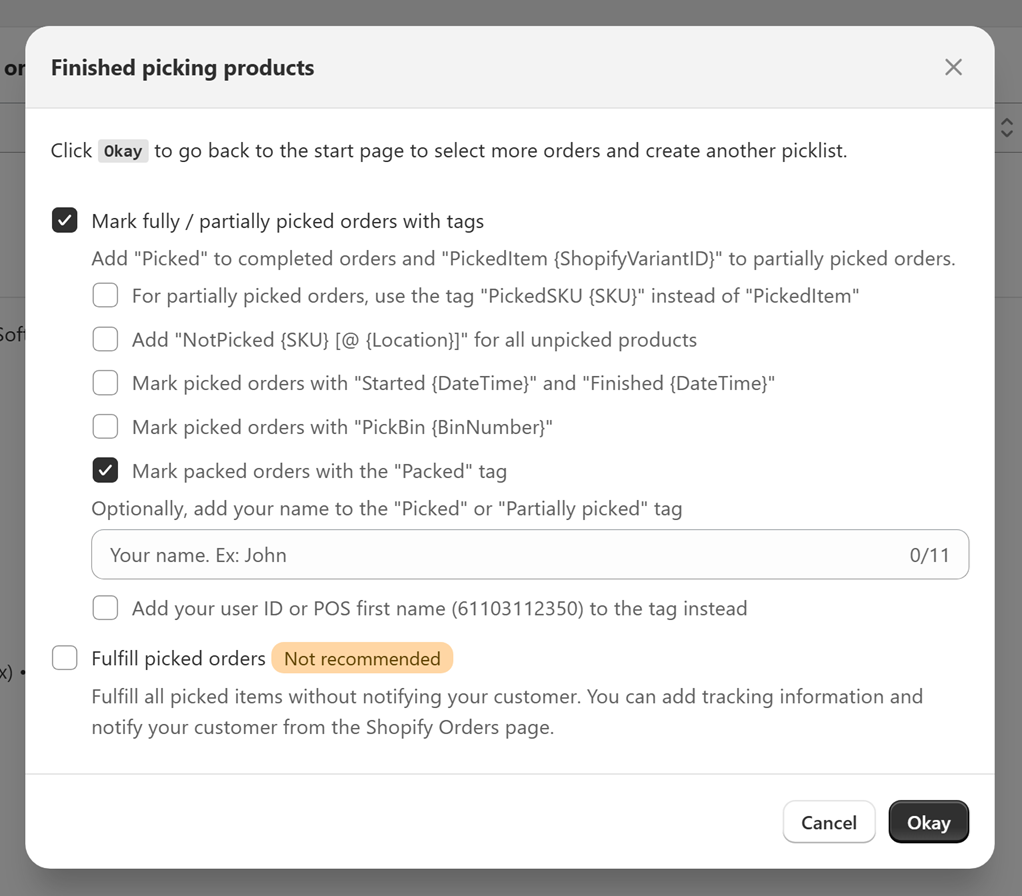
Click “Finished” (top right) when you are done picking or packing. In the Finished picking products dialog, you can tag fully or partially picked orders with: Picked or PickedItem {ShopifyVariantID} tags. These tags appear in the Shopify Orders page and help identify orders ready for shipping or label printing. If multiple staff members are picking orders, you can add the picker’s name as a tag. You can also add a timestamp to track when the order was picked.
Notes & Important Information
- There is no limit to the number of Shopify locations or users who can use Pick List Pro.
- Picklists are available only on the device where they were created. To share a picklist, select orders, and click “Share” to copy a sharable link to your clipboard.
- To display a custom metafield in your picklist, click “Preferences” on the top menu bar, and select up to 5 product or variant metafields.
- All settings and preferences are tied to the logged‑in Shopify user account. They are not shared between users.
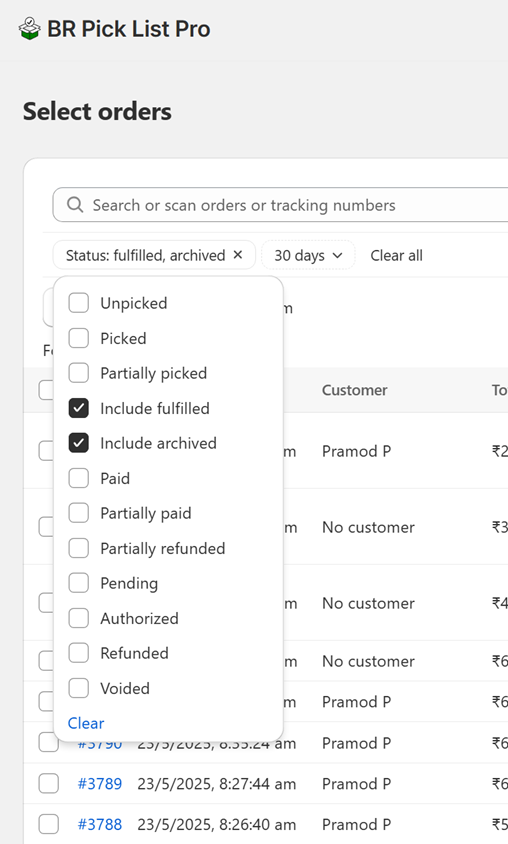
- If your shipping app automatically marks orders as fulfilled, they will not appear on the “Select orders” page. Use Include fulfilled and Include archived to view/pick them.
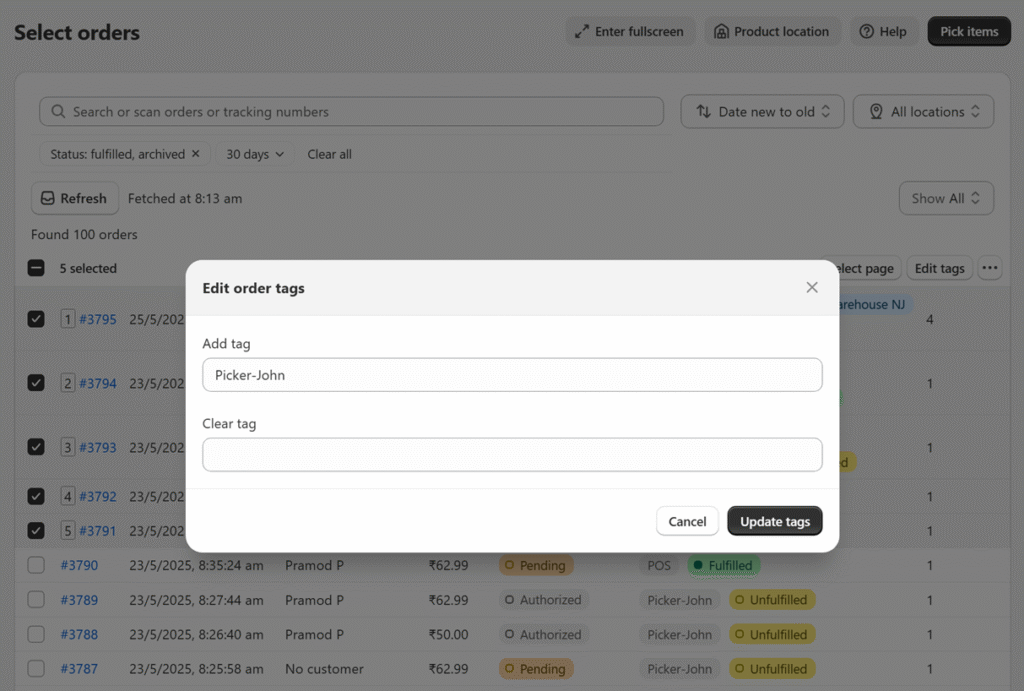
- Supervisors can assign orders to specific staff by adding tags with the prefix Picker-{Name}. To do this click “Edit tags” after selecting one or more orders on the “Select orders” page.
- On iPhone/iPad (Shopify Mobile or POS), local storage is cleared if the device is rebooted or powered down. Any open picklists will be cleared. On PCs, Macs, and Android devices, picklists survive a reboot.
-
AuthorPosts
- The forum ‘Pick List – Frequently asked questions’ is closed to new topics and replies.