› › Stock Take – Frequently asked questions › How do I use the Stock Take app
- This topic has 0 replies, 1 voice, and was last updated 4 years, 3 months ago by admin.
-
AuthorPosts
-
5 January 2021 at 1:02 pm #157adminKeymaster
When you first install the Stock Take app on Shopify you are on a 15 day trial with no cap on the number of locations or variants.
Watch our demo YouTube video here.
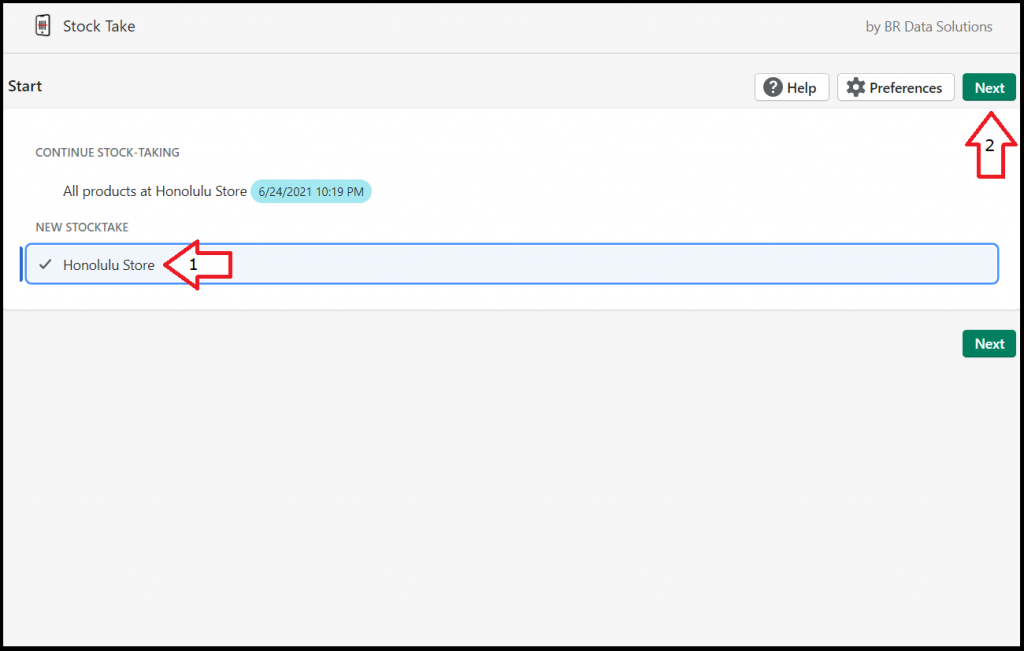
1. To start stocktaking, first select a location and then choose products to inventory. You can start a new stocktake or join an open stocktake started by another user. Instructions for using multiple devices can be found here.

Note: do not start more than one stocktake at the same time for the same location, doing updates from two or more stocktakes will cause stock adjustment errors. The app will warn you if you accidentally try to start additional stocktakes for any location.
2. You can do a whole store inventory or filter your products by vendor, product type, tags, collections or choose individual products to inventory. After you complete your stocktake and “Update inventory”, all products with stock errors will be fixed by the app, and all unscanned products that currently have stock in Shopify will be adjusted to zero. For example, if you filtered your products by the vendor “Armani”, during an update, Armani products with errors will be fixed and Armani products not scanned will be adjusted to zero. Products from other vendors will remain unchanged.
If you wish to disable this behavior, check the “Cycle count” box. Only products you’ve scanned or counted will be modified, all unscanned products will be left unchanged in a cycle count. Cycle counting is recommended only if you plan on quickly counting and updating a small set of products.

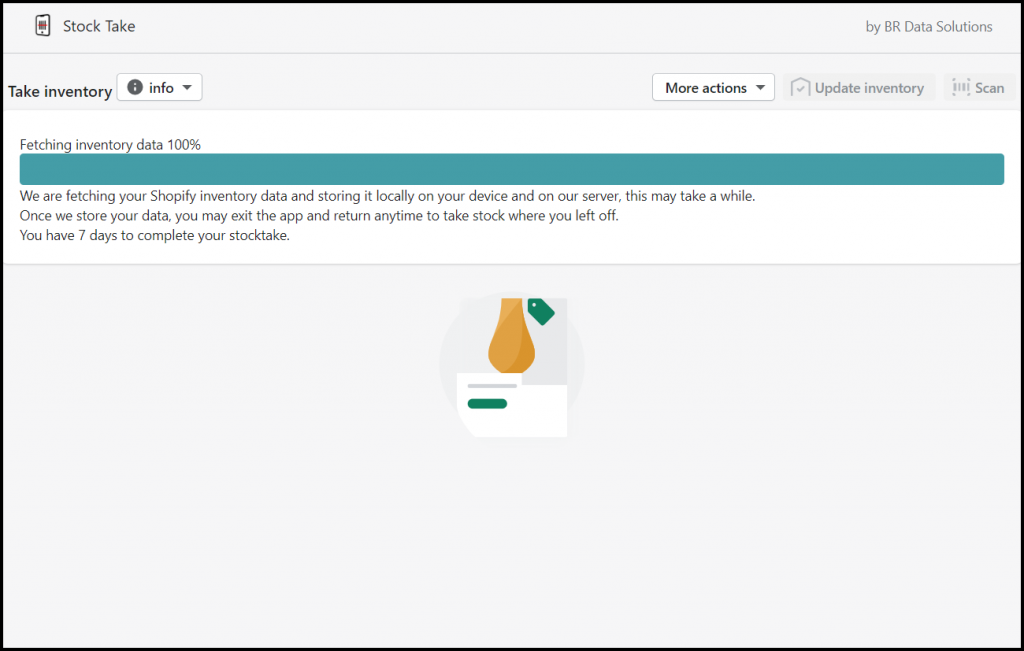
3. The app will fetch the selected product-variants and any unfulfilled orders from Shopify every time you start a new stocktake. Depending on the size of your store, and the number of products selected, this process may take several minutes (typically 2 minutes for 5000 product-variants). Only products stocked at your selected Shopify location that are in “Active” status are fetched from Shopify (this behavior can be changed in Preferences if you wish to take stock of “Draft” or “Archived” products).

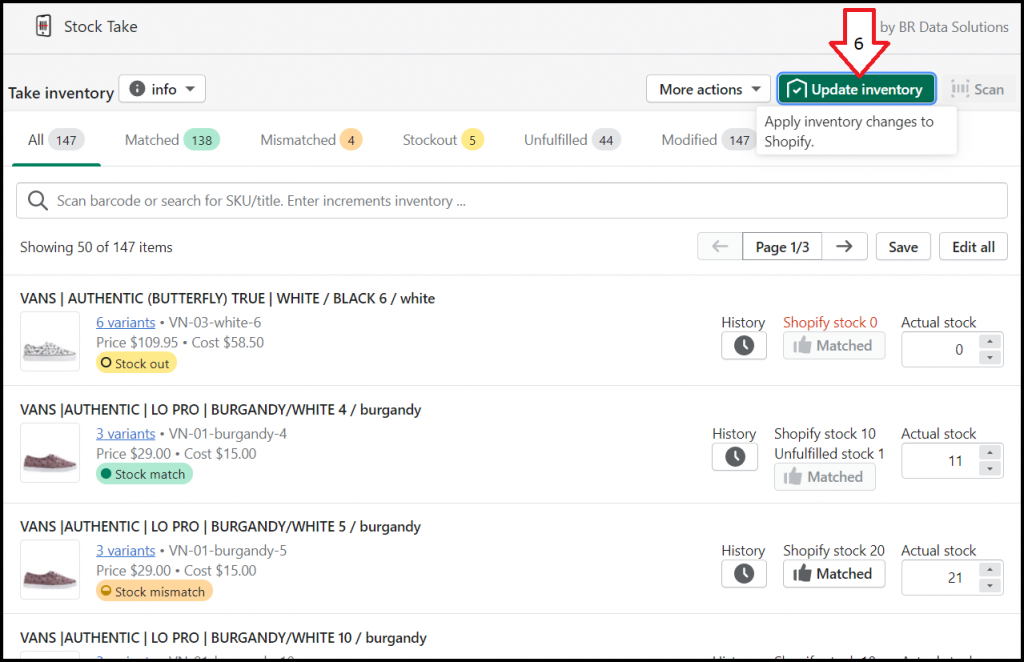
4. After your inventory data is fetched and stored locally, the app will display for each product-variant, the on-hand “Shopify stock”, and any “Unfulfilled stock” from unshipped online orders (also called committed stock within Shopify). Your physical inventory count is listed under “Actual stock” and is initially set to zero.
If you’re using Stock Take from the Shopify mobile or POS app you can scan barcodes with your iPad/iPhone/Android camera. If you’re using our app from your browser on a PC or a Mac you can place the cursor in the search box and use a handheld barcode scanner to count your inventory to update your “Actual stock”. Please ensure your scanner is setup to work in HID Keyboard mode.
You may also setup your Bluetooth wireless scanner to work with your iPad/iPhone if you don’t want to use the camera.

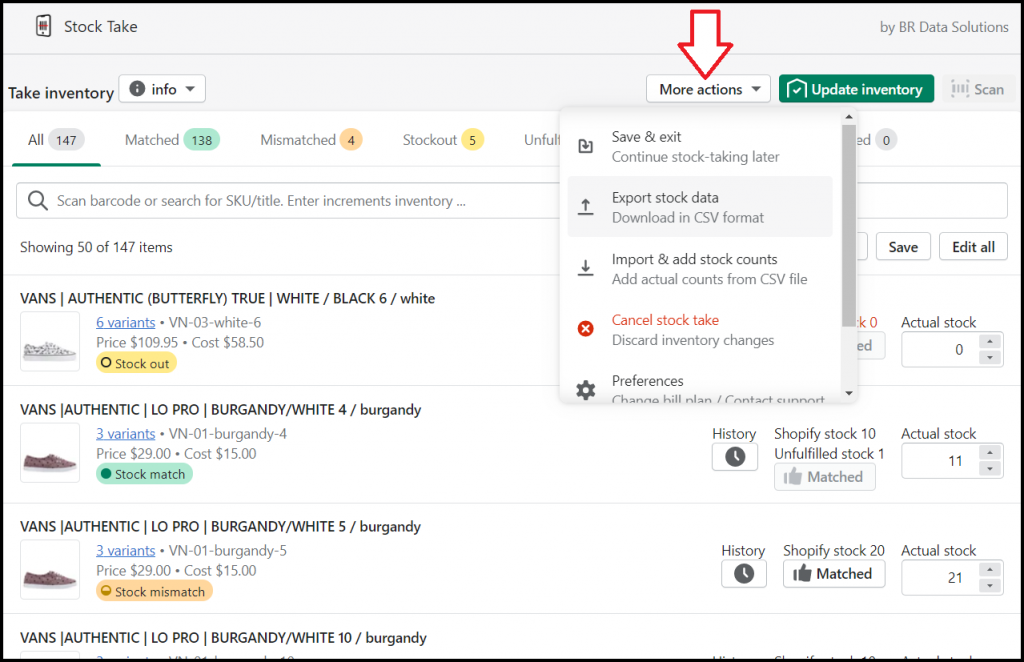
Nothing is modified in Shopify while you scan/edit the “Actual stock” counts. All your counts are auto-saved in your browser/Shopify app local storage, so you can exit and restart the app without losing your stock counts. Additionally, you can click the “Save” button or “Save & exit” from the “More actions” menu to back up your stock data to our server. This ensures your data is recoverable even if your device fails or locally stored data is deleted.
5. The app will modify your product counts in Shopify only if you click “Update inventory” after you finish counting stock. To ensure you are completely aware of all changes that the app is going to make, you are advised to click the “Mismatched” tab before you do an inventory update. This tab will list all the products that are going to be adjusted because your counted stock (Actual stock) is different from Shopify’s available stock.

When our app Updates inventory, it takes your “Actual stock”, subtracts any “Unfulfilled stock”, and makes it Shopify’s “Available stock”. A report of your original stock and any changes to stock in CSV format is emailed to the store owner and is also available for download from the “History” section of the start page.
Note: Do not click “Update inventory” until you have counted all the items listed in your stocktake. If you click update when some or all your inventory has an “Actual stock” of zero, your Shopify inventory for those items will be adjusted to zero. Use the cycle count option if you wish to update only scanned inventory.

You are safe trying the app’s various features without modifying your store inventory as long as you do not click “Update inventory”. You can always cancel the stocktake and restart it at any time. You can take multiple days to finish your stock count, this is typical for a large store with thousands of products to inventory. Please ensure you save your changes to our server by clicking the “Save” button or use the “Save & exit” option when you are done for the day. Stocktakes are stored on our server for 60 days from the day you start before being deleted.

Any incoming online orders will be handled correctly during the stocktake without you having to adjust any of your stock counts. If products are being removed from your shelves during a stocktake (either for an online order fulfillment or due to an in-store POS sale) please make sure they have already been counted by our app. This will ensure your stock counts are accurate in Shopify after you click “Update inventory”.
-
AuthorPosts
- The forum ‘Stock Take – Frequently asked questions’ is closed to new topics and replies.
